How to Incubate Bearded Dragon Eggs at Home: A Step-by-Step Guide
Introduction
Bearded dragons are fascinating creatures that make great pets. These reptiles are known for their docile nature and colorful appearance. If you own a female bearded dragon, there is a good chance that she will lay eggs at some point. Proper incubation is crucial for the development of bearded dragon eggs. In this blog post, we will guide you through the process of incubating bearded dragon eggs at home, using a homemade incubator.
Materials Required
- A plastic container with a lid (big enough to hold the eggs)
- A heating pad
- A thermometer
- Hygrometer
- Vermiculite or perlite
- Water spray bottle
- Egg container or egg crate
- Aluminum foil
Preparing the Incubator
Before we start incubating the eggs, we need to create a stable environment for them. Follow the steps below to prepare the incubator:
Step 1: Create the Incubation Substrate
The first thing you need to do is create the incubation substrate. The substrate is the material that holds the moisture around the eggs. Vermiculite or perlite are the two most common substrates used for bearded dragon eggs. Follow these steps to prepare the substrate:
- Fill the plastic container with warm water up to 1/4th of the height
- Add the vermiculite or perlite to the container and mix it until it is soaked with water
- Remove the excess water by squeezing the vermiculite or perlite with your hands. It should be moist but not dripping.
Step 2: Create the Egg Container
The next step is to create the egg container. You can use a plastic egg container or an egg crate, and cut it to fit inside the plastic container. Follow these steps to create the egg container:
- Cut the egg crate or egg container to fit inside the plastic container
- Place the egg crate or container on top of the moist vermiculite or perlite bed
Step 3: Add the Thermometer and Hygrometer
The thermometer and hygrometer help ensure that the temperature and humidity levels are appropriate for the eggs’ development. Follow these steps to add the thermometer and hygrometer:
- Place the thermometer inside the incubator on top of the egg container
- Place the hygrometer in the incubator, next to the thermometer
Incubating the Eggs
Once the incubator is prepared, it is time to incubate the eggs. Follow these steps for a successful incubation process:
Step 1: Collect the Eggs
Carefully remove the bearded dragon eggs from the nesting area and place them in the egg container.
Step 2: Place the Eggs in the Incubator
Gently place the eggs inside the egg container, making sure that they are not touching each other. Cover the lid and place the incubator in a warm, undisturbed area.
Step 3: Monitor the Temperature and Humidity
It is essential to monitor the temperature and humidity levels of the incubator. Below are the optimal conditions:
- Temperature: 84-88 degrees Fahrenheit
- Humidity: 70-80%
Adjust the temperature and humidity levels by turning the heating pad up or down and spraying water if necessary. Make sure not to spray directly on the eggs, as this can cause damage.
Step 4: Egg Development
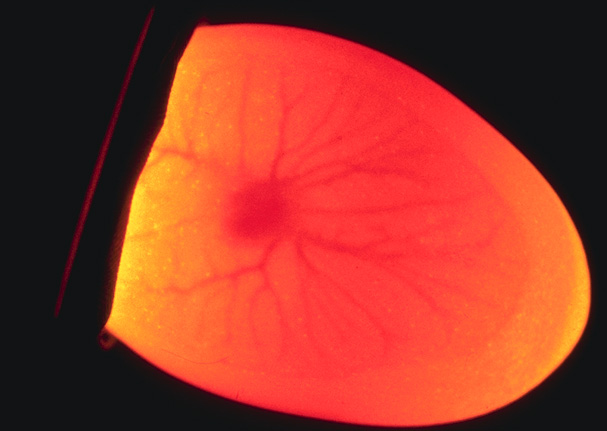
Bearded dragon eggs take around 60-75 days to hatch. During this time, it is essential to keep the incubator at the ideal temperature and humidity levels. As the eggs develop, you may see veins, and the embryo will grow in size. Be patient and do not disturb the incubator during this time.
Conclusion
Incubating bearded dragon eggs at home can be a rewarding experience. By following the steps outlined in this blog post, you can create a stable environment for the eggs to develop and hatch successfully. Remember to monitor the temperature and humidity levels, and do not disturb the incubator during the incubation process. Good luck with your bearded dragon breeding project!


